Notebook Cover
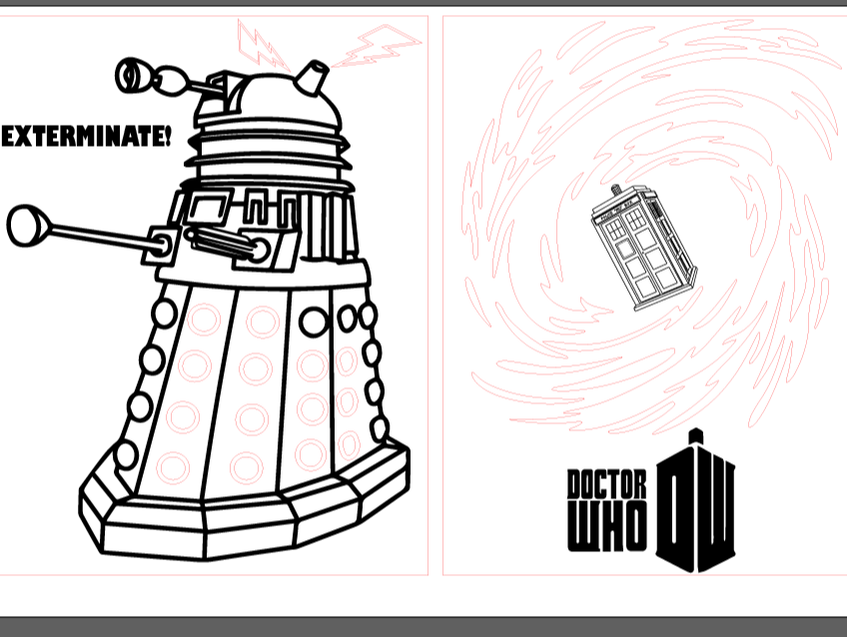
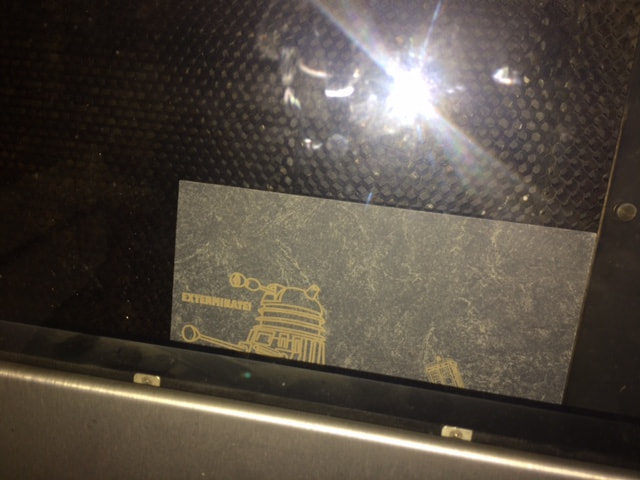
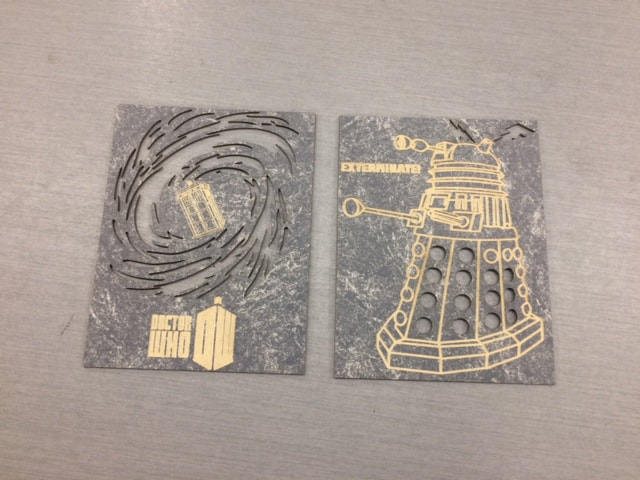
First I began the project by creating an Illustrator file. Then I created two rectangles in the artboard that I was provided. Next, all I needed was to think up a design that I could put on my notebook. The only requirement was that there had to be at least one cut-out design on the front page of the notebook. I then decided that I would make my notebook cover's design Doctor Who themed. I decided to at first have the Dalek be on the front page of the notebook, I later changed my mind and decided to have the side with the Doctor Who logo as my front cover. I decided that I should add the TARDIS going through some sort of spiral or vortex, I then found an image that I really liked but the TARDIS couldn't fit within that image so I had to end up cutting some of the image to fit the TARDIS inside it. Then I had an amazing idea. I figured: "why not cut out the spiral design?" So then I did. I also added the Doctor Who logo to make it look extra nice. Once I had all of this done, I saved it to my drive and headed down to the lab. I picked the coolest-looking (but also right-sized) piece of matboard that I could find, then I put in all of the specifications that I needed for the matboard. I centered the laser onto the matboard and clicked print. It engraved and printed out my design without any flaws or errors that I could see. Overall, I think it turned out wonderfully!
Water Bottle |
|
|
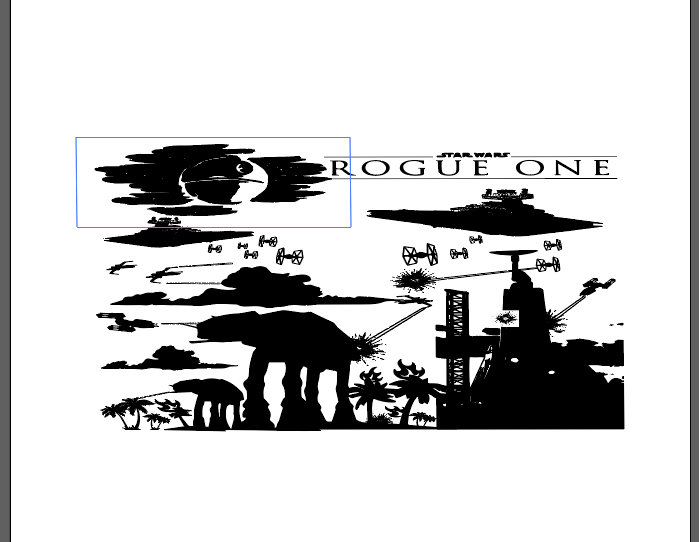
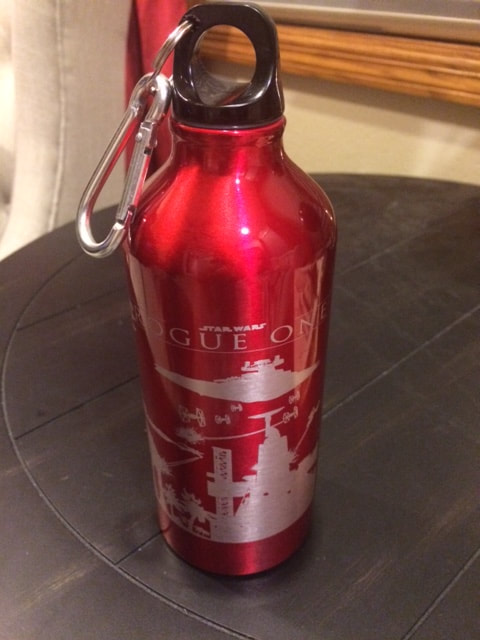
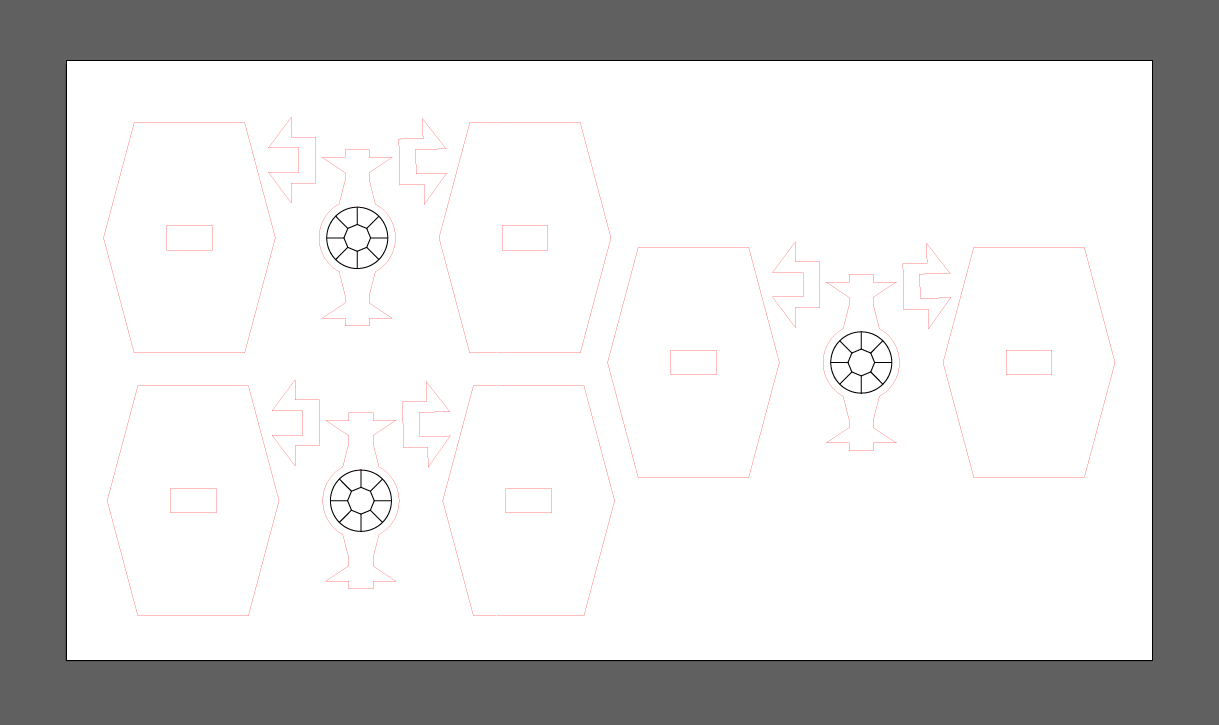
I started off by coming up with the idea of what to put on the water bottle, which ended up being Star Wars. Then with that idea in mind, I set off to Illustrator to make my design. It took me about 2 class periods to make my design, and in the end I'm pretty satisfied with how my design turned out. Next, once I had all of my design completed, it came time to actually put the design onto the water bottle. So I then headed to the laser and tried (and failed a few times) to put the water bottle into the rotational jig. When all of that was set up and measured correctly in UCP, I pressed the green button and watched as my design was slowly engraved onto the water bottle. In the end, the laser printed out the design nicely and I think that nothing turned out bad at all!
|
|
3D Object
|
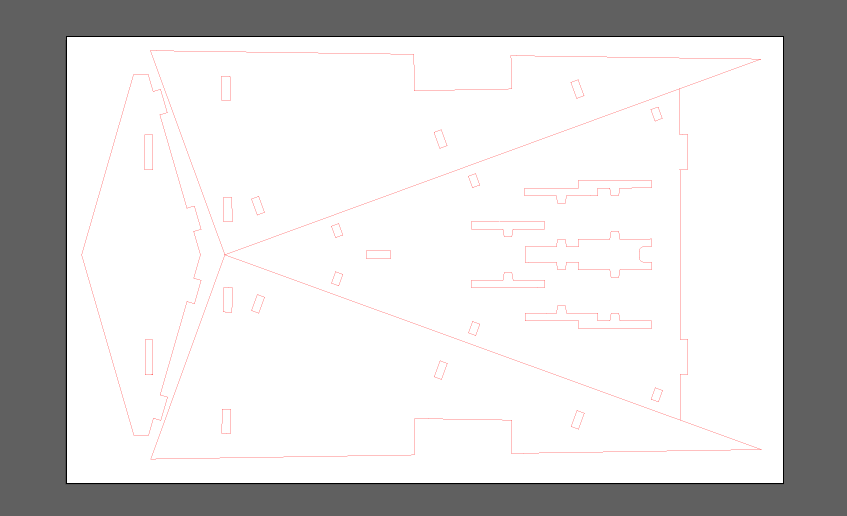
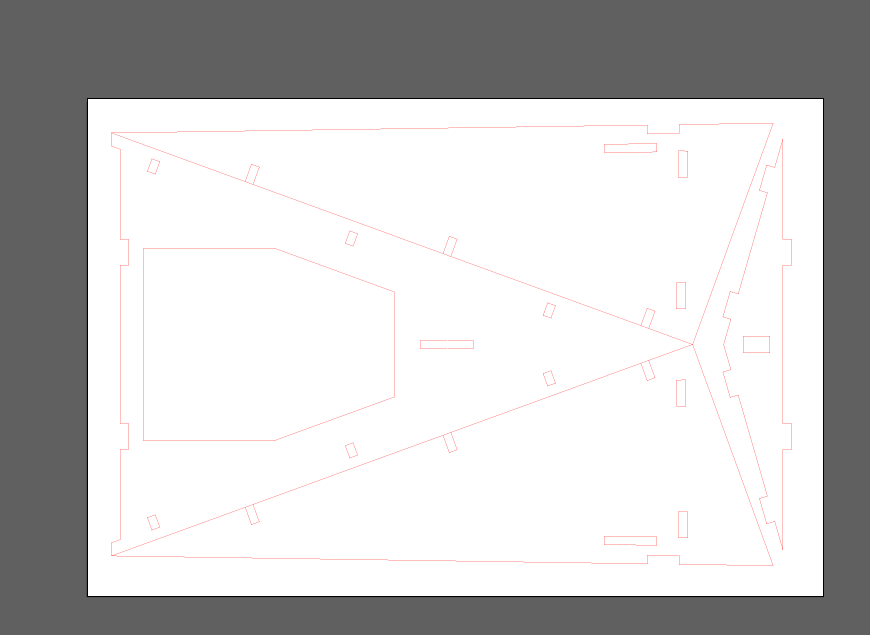
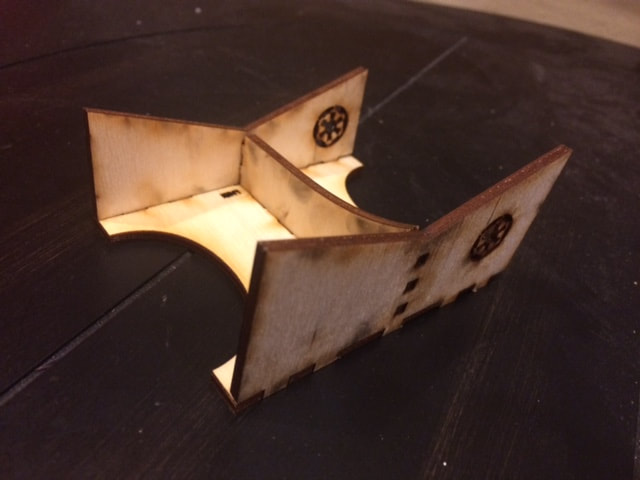
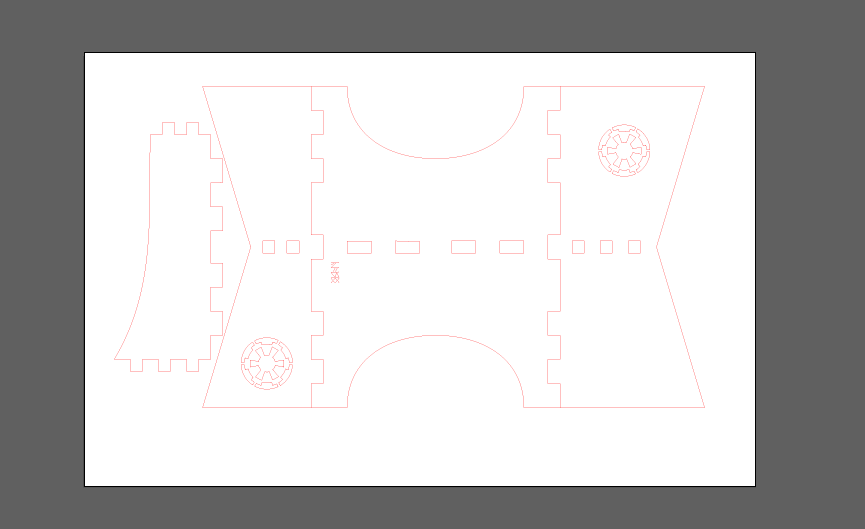
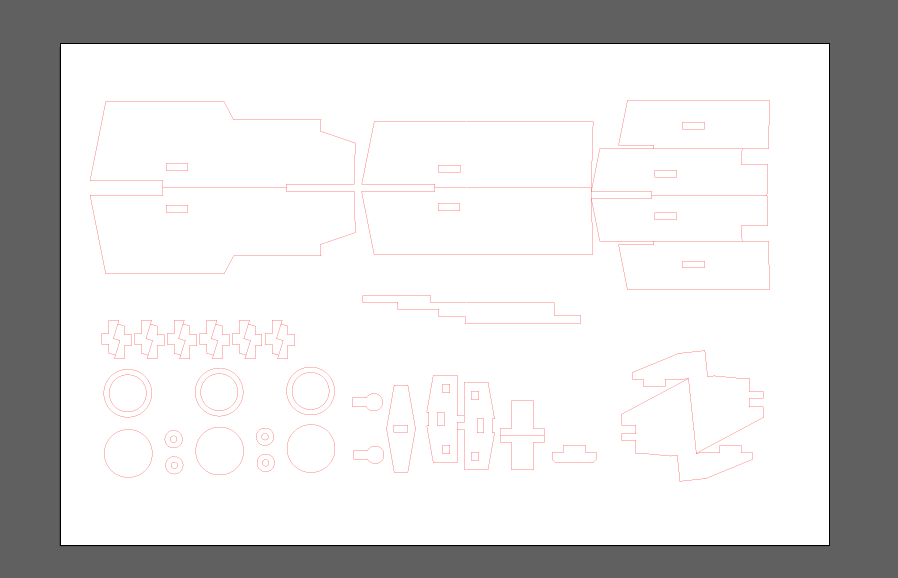
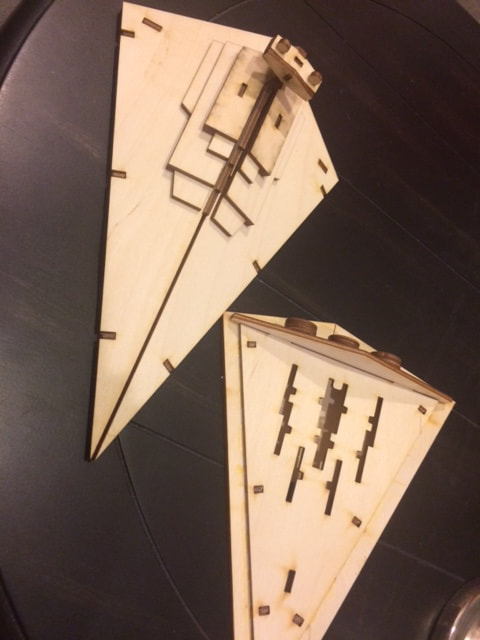
For this project I had to begin by finding a creation on Thingiverse that was laser-cut. I eventually settled on a small-scale Star Wars star destroyer model. I then downloaded the files to Illustrator and changed the model to my liking. (scale, where to cut, etc.) Once I had everything ready, it was time to get my materials. I went and bought 3 12" x 20" boards (since the materials were not going to be supplied to us this time). When I had all of my materials ready, I went down to the laser to cut them out. I set up UCP to ensure that my boards would be cut-out properly, focused the laser just to where I wanted it to cut, and then pressed the green button. The laser cut out every little piece of the model quickly, and in no time, I moved on to the next portion of my project: Assembling the model. Thankfully the creator of the model provided me with an instruction manual on how to put together the model. It was challenging, but also fun in a way. I ended up gluing everything together just right and the model turned out wonderfully!
|
|
What I learned
Overall, successfully completing all of these projects helped me get a better understanding of how to use Illustrator, how to create 3D objects using a laser, and also how to scale things to the correct size based on the thickness of my materials. I made of couple of mistakes along the way (especially on the 3D object project), but other than that, I would say that I have been really successful with all of my projects.
