CNC Router Maze Project:
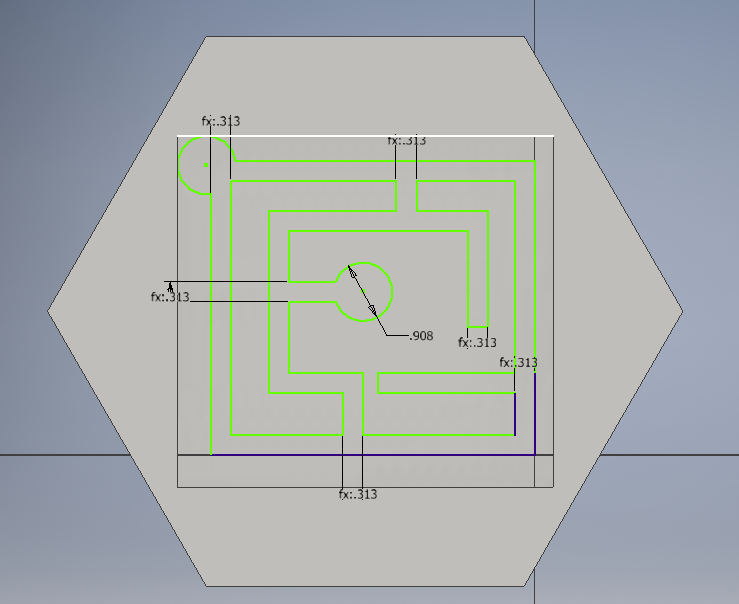
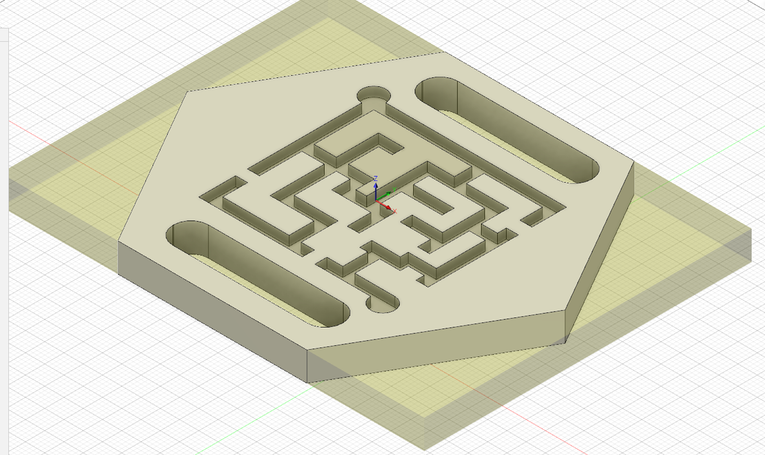
So first I started off by creating an Inventor file. We were given a set of criteria and constraints to make our mazes correctly. The size of the maze was limited to 8"x11", but the shape of the maze was not limited. (I decided later that I would make my maze in the shape of a hexagon.) The depth of the tunnels were 1/4" deep. I decided that I would make my maze fairly difficult, but no too overly complex because as I believe, the simplest design is usually the best. I started on my maze and got pretty far into it. But eventually I realized that I wasn't very satisfied with the design, so I changed it. I used circles to mark the beginning and end of the maze, so that it would be more obvious.
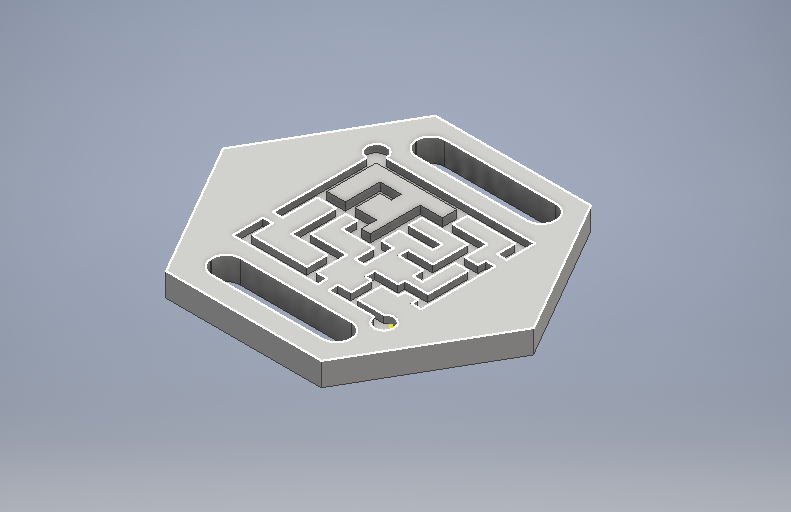
Then, once I had finished my new maze design, I exported the file over to Fusion 360. Fusion 360 is a very complicated program, but to simplify it for you, basically what I did on the program was set and code a path for the CNC router to follow and cut out my maze design. I also have to set the size of the "stock" or the material that I'm using. (which is foam in this case.) Then to finish my fusion file and prepare it for the router, I had to convert the file into G-Code. (G-Code is the language that the router uses to coordinate and move.) Once I converted the fusion file into G-Code, I exported it onto my USB and took it down to the lab. I plugged in my USB, and loaded the G-Code. But before I could start, I had to set up my foam. I took a ruler and measured the foam to find the center. Once I had found the center, I marked it, and then put some two-sided tape onto the back of the foam before loading it into the router. Then using the controls of the router, I (and another classmate) centered the router drill right onto the point that I marked. Once I was sure that everything was going ok, I pressed start. I made sure that I kept my hand on the spacebar incase something went wrong. Fortunately, nothing went wrong, and the maze was routed out perfectly. However, I wasn't completely done with the maze yet. I needed to engrave my name onto the maze using a laser, so I logged into Illustrator, used the text tool and entered my name into the artboard. The only two things that I really needed to absolutely know was to change the text to the color blue and only use that small laser so that the foam doesn't melt. I did that and then went down to the lab and placed my maze into the small laser.
What I Learned:
During this project I learned how to export an Inventor file to Fusion 360, how to actually set up and use Fusion 360, and also how to successfully operate the router.
