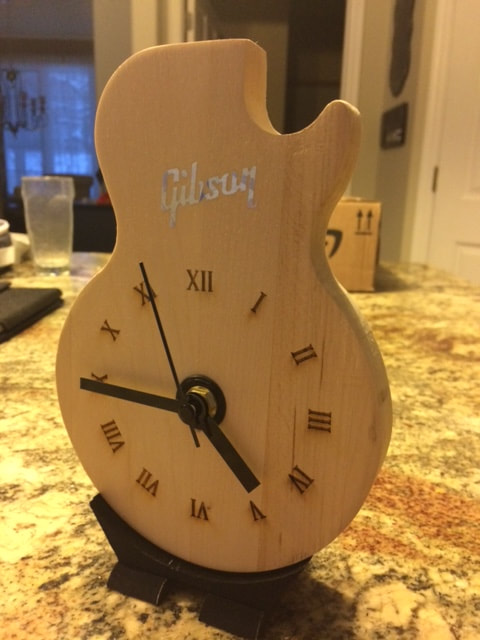
IDEA Final Project: Clock Body
We were given these specific directions for creating the clock: It has to use 3 of the machines that we've learned to use this year. I decided that I would bring in my own wood and use the router as my first machine. Then I would laser the numbers onto the clock using the small laser. Then for my final machine, I would 3D print a stand for my clock to sit on.
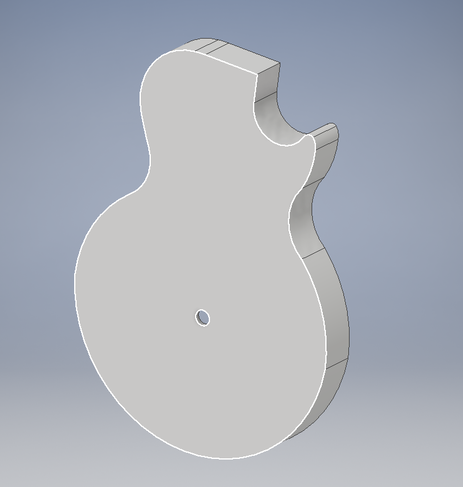
I started by creating an Inventor file for my clock, I ended up having to create the file 4 times because I made the first file too small, the second file too large, and then the third file was just right, but then Inventor had an update and cleared it. But the fourth file turned out the best in my opinion.
I started by creating an Inventor file for my clock, I ended up having to create the file 4 times because I made the first file too small, the second file too large, and then the third file was just right, but then Inventor had an update and cleared it. But the fourth file turned out the best in my opinion.
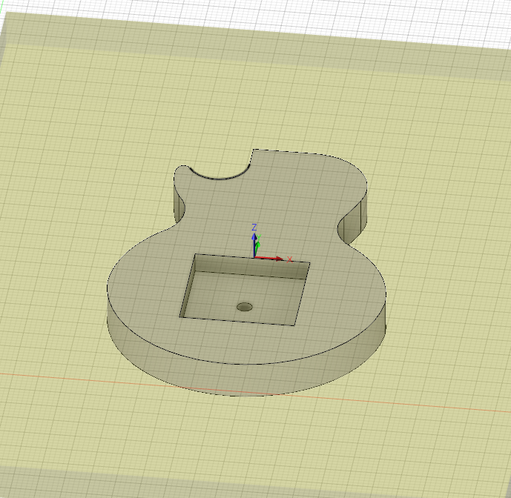
I then uploaded the Inventor file to Fusion 360 and began creating the path for the router. I had to use a 2D contour for cutting the outside of the clock, and then use a 3D adaptive clearing for the contour where the clock will be placed. I found out that the hole where the clock part will be inserted is too small for the router to cut out, so in the end I just measured the center of the square and drilled the hole in myself. After running the simulations a few times to make sure that it would run well, I generated the G-code, put it onto my USB, and headed down to the lab to route it out.
|
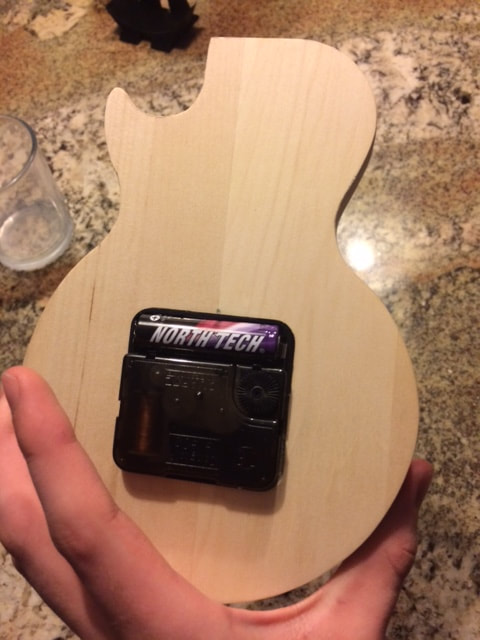
I went down to the lab, grabbed a marker, and measured the center of my board. Then once I had marked where the center of my board was, I lined up the router right on the center of the board and clicked start. I made sure to keep my hand on the space because we would need to later stop the machine in the middle of cutting just so we could adjust the clamps. After all was said and done, I think that the clock body was routed out excellently! And just to make everything nice and smooth, I sanded the whole body down with a palm sander.
|
IDEA Final Project: Clock Stand
|
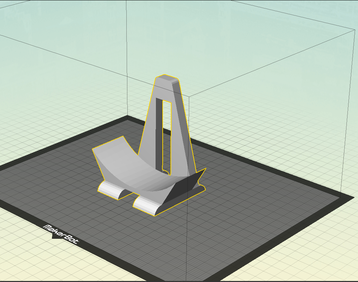
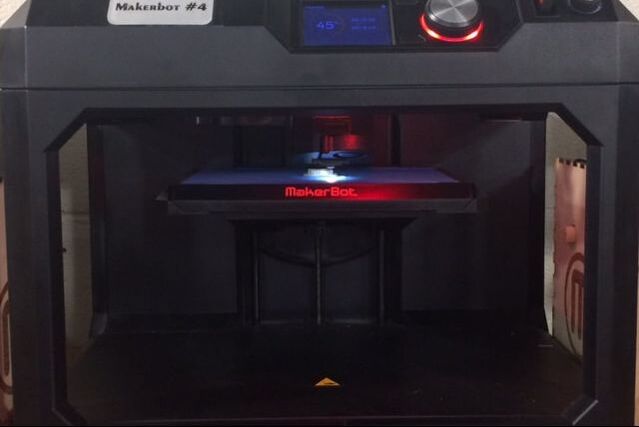
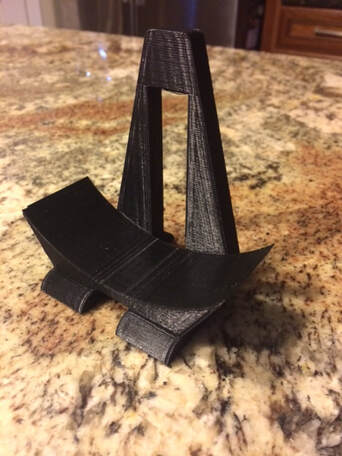
I created the file for the stand on Inventor (it was relatively easy), then I exported it to Makerbot. On Makerbot I set up the size and position of the stand, then checked over the preferences. (I also checked rafting just incase, but it didn't need it.) Then once everything looked alright I grabbed my USB, downloaded the Makerbot file, and headed down to the lab. When I found an open 3D printer with a filament color that I liked, I plugged my USB into the 3D printer, uploaded my file, and clicked print. (I actually ended up printing my stand before I routed out my clock.) It took around 3 hours to print out. When it got done printing, I was happy with how it turned out. It fits my clock pretty well, and serves its purpose as a stand.
|
IDEA Final Project: Clock Numbers
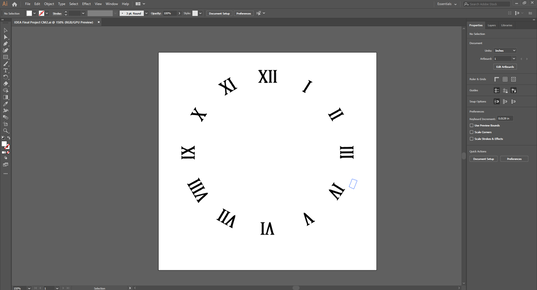
I didn't have anything truly creative for the numbers, I just decided to look up vector images of clock numbers, and this one happened to come up, and it looked pretty good. So I created a new Illustrator file, quickly measured the diameter of my clock, and then added the image to the file. The only difficulty (it wasn't difficult) was adjusting the image to the size of my clock. Once I was satisfied with how the file looked, I saved it to my USB and headed down to the lab.

I decided to use small laser (because the big laser was in use, and also my clock is small enough to fit into the small laser.) I put my USB into the computer, opened up my Illustrator file, and then clicked print. I opened preferences and made sure to set the laser to general soft woods (because I'm using basswood, which is very soft.) Once I had all of the preferences set up, I opened UCP and set up the laser. I centered the numbers very well on the clock, and then clicked the start button. It took about 3 minutes to laser all of the numbers onto the clock. Once it was done, I inspected everything, and left satisfied with how the numbers on my clock turned out.
IDEA Final Project: Vinyl Logo (Optional)
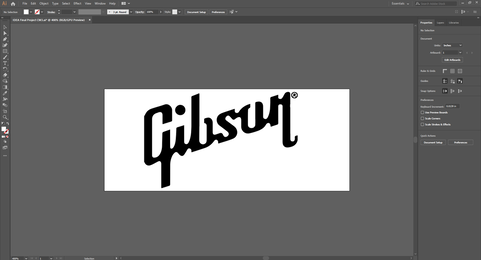
Now, I didn't have to add a vinyl logo to my clock because I'd used all 3 machines and I could successfully assemble my clock and be done. But I decided that I wanted to make my clock look nice by adding a guitar logo to it. I had to adjust and cut my vinyl logo out 3 times because it turned out to be backwards the first 2 times, but after changing the orientation of my Illustrator file, the vinyl cutter successfully cut it out forwards instead of backwards.

I didn't have any trouble applying the vinyl and to be honest, I think that adding the vinyl logo was a good idea, because it made my clock look alot better.
What did I learn?
During this whole project, I feel like I learned: How to use multiple machines to create one singular object, how to set up the router for wood, and overall, how to make a clock!
